This David Papkin post on NFS sharing is derived from RootUsers post https://www.rootusers.com/how-to-mount-an-nfs-share-in-windows-server-2016/
Here we’re going to show you how to mount an NFS file share in Windows Server 2016 both temporarily and persistently so that it will automatically mount after a reboot.
There are a couple of different ways this can be done, including mapping a network drive or adding a network location, which we’ll discuss here.
Our NFS Server: In this example we already have an NFS server setup on a CentOS 7 Linux system which is available at 192.168.1.14 and we have exported the /root/nfs directory with NFS. See our guide on creating an NFS server in Linux here if you need information on how to do this.
Install NFS Client
Before we can mount any NFS shares on our Windows server, we must first install the NFS client feature. This can be done through the graphical user interface (GUI) using server manager, however that takes a lot longer so we’ll use some PowerShell.
First we’ll use the Get-WindowsFeature cmdlet to search for available features that contain the string ‘NFS*’ in the Name field.
PS C:\> Get-WindowsFeature -Name NFS*

As we can see NFS-Client is available for install but not currently installed.
Next we use the Install-WindowsFeature cmdlet to install the NFS-Client feature, as shown below.
PS C:\> Install-WindowsFeature -Name NFS-Client

Once complete we should see that the installation has completed successfully, no reboot is required for this feature, we can begin using it straight away.
Mount NFS Temporarily
We can use the mount command in command prompt to quickly mount our NFS share and confirm that it’s working. Note that the mount command used here is in command prompt rather than PowerShell, using it in PowerShell will fail as it is a different command.
C:\Users\Administrators> mount \\192.168.1.14\root\nfs X:
X: is now successfully connected to \\192.168.1.14\root\nfs

The command completed successfully.

At this point we can browse to “This PC” and we should see the NFS share mounted under Network Locations.
There is an issue with this however, this mount is not persistent meaning that if we perform a restart of the Windows server it will not be there afterwards. Luckily there are a few ways we can permanently map to the NFS file share.
Mount NFS Persistently
Most of the time we will want our NFS mount to survive a system reboot and mount automatically after boot so that we don’t have to manually mount it every time.
There are a couple of different ways that we can achieve this task:
Map Network Drive
I personally prefer this method, as we can see the space remaining much more easily.
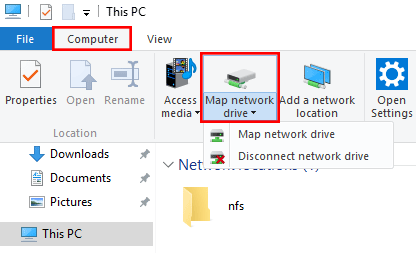
- First open up “This PC” and select Computer from the menu at the top. From here click on Map network drive, as shown below.
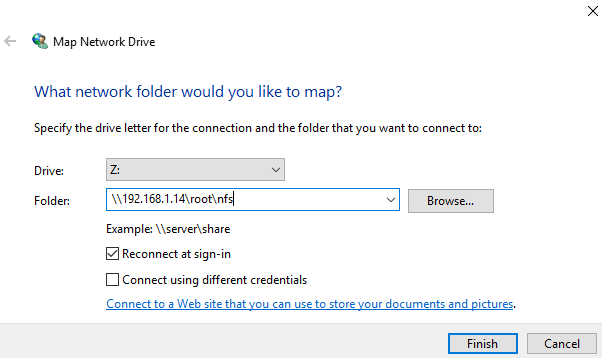
- The Map Network Drive window will open, select the drive letter that you want to assign to the NFS share, followed by the IP address or hostname of the NFS server as well as the path to the exported NFS directory. Click the Finish button when complete.
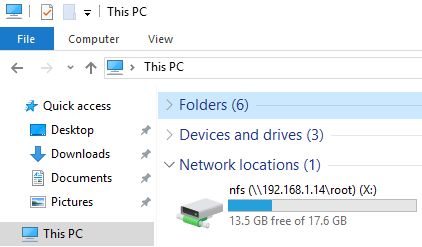
 You may see a pop up window showing that the connection is being attempted. Once complete the shared NFS folder will open up.
 - When you view “This PC” you will see the mapped network drive under Network location. This method is better than adding the network location as we’ll discuss next as it clearly shows how much disk space on the NFS share is in use and how much is still available.
Add A Network Location
This will basically create a shortcut to the mounted NFS directory for you to access at any time, it will also be available after restart just like the map network drive method above.
- First open up “This PC” and right click in the white space area and select “Add a network location”.

- On the welcome screen click Next to proceed.

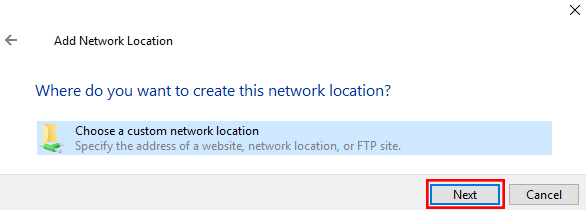
- Select that you want to choose a custom network location, followed by the Next button.
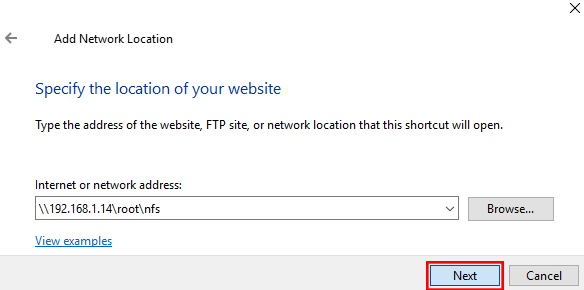
- Enter in two back slashes, followed by the IP address or hostname of your NFS server, followed by the path that is being exported by the NFS server. Click Next once you’ve filled this in.
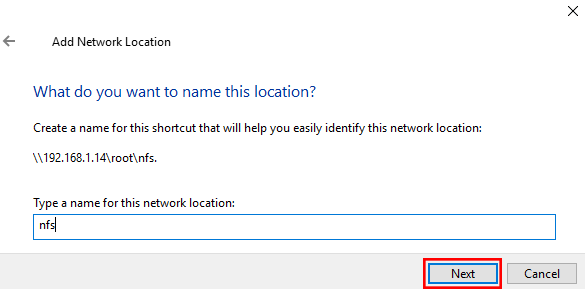
- You can now select a custom name for the network location, click Next once you’ve set one.
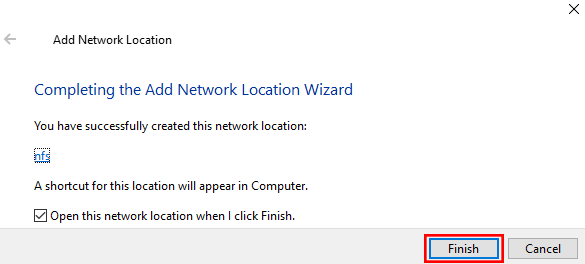
- To complete the process, simply click the Finish button on the completion screen.
- We can optionally open the NFS mount now, or we can browse to “This PC” and see the folder shortcut listed under the “Network locations” setting as shown below.
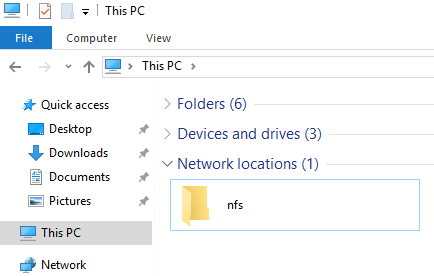 As mentioned note that this does not show the disk space in use like the network drive mapping option.
Summary
We have shown you how to install the NFS client feature in Windows Server 2016, and then mount an NFS share from a Linux server both temporarily through command prompt with the mount command, and persistently so that the NFS share is mounted automatically after the server has been restarted.
By doing this we can easily access files from a Unix or Linux based operating system over NFS from Windows.
End of This David Papkin post on NFS sharing
David Papkin favorite movies